_01JMZ4H43P2JR7Z62M1XDT4TBF.png)
Custom Webhooks: Turn Any Business Event into High-Converting Social Proof 🔗
Most Fomo users start with our 100+ native integrations. But your business is unique. Whether you have a custom-built checkout, a niche CRM, or a specialized membership platform, Custom Webhooks are your "all-access pass" to total design and data freedom.
Webhooks allow you to feed data into Fomo from almost any app on the internet. Instead of being limited by what an integration thinks you should show, Webhooks give you the keys to your own raw data.
Why Use Webhooks? (The CRO Perspective)
Webhooks are the "God Mode" of Social Proof because they offer:
- Unlimited Data Freedom: Since you have access to the full JSON payload, you aren't stuck with just "Name" and "City." If your app tracks "Miles Run," "Trees Planted," or "Points Earned," you can capture it.
- Custom Variable Mapping: You can create and display your own custom variables. This allows you to show hyper-specific social proof that perfectly matches your niche (e.g., "Sarah just reached Level 10 in the Masterclass").
- Real-Time Velocity: Bypass the polling delays of some standard integrations. Webhooks push data to Fomo the millisecond an event occurs, creating instant urgency.
- Unified Event Tracking: You can configure as many webhooks as you’d like. Give them each custom names inside Fomo > Notifications > Custom Webhooks > Settings to keep your various conversion funnels organized and distinct.
Step 1.1: Create Your Endpoint
Before your apps can send data, you need to create a "mailbox" in Fomo to receive it.
- Log in to Fomo and navigate to Notifications tab > +Add Notifications
-
Search for All Notifications or Scroll down to create your own or simply type Custom Webhook in the search bar.
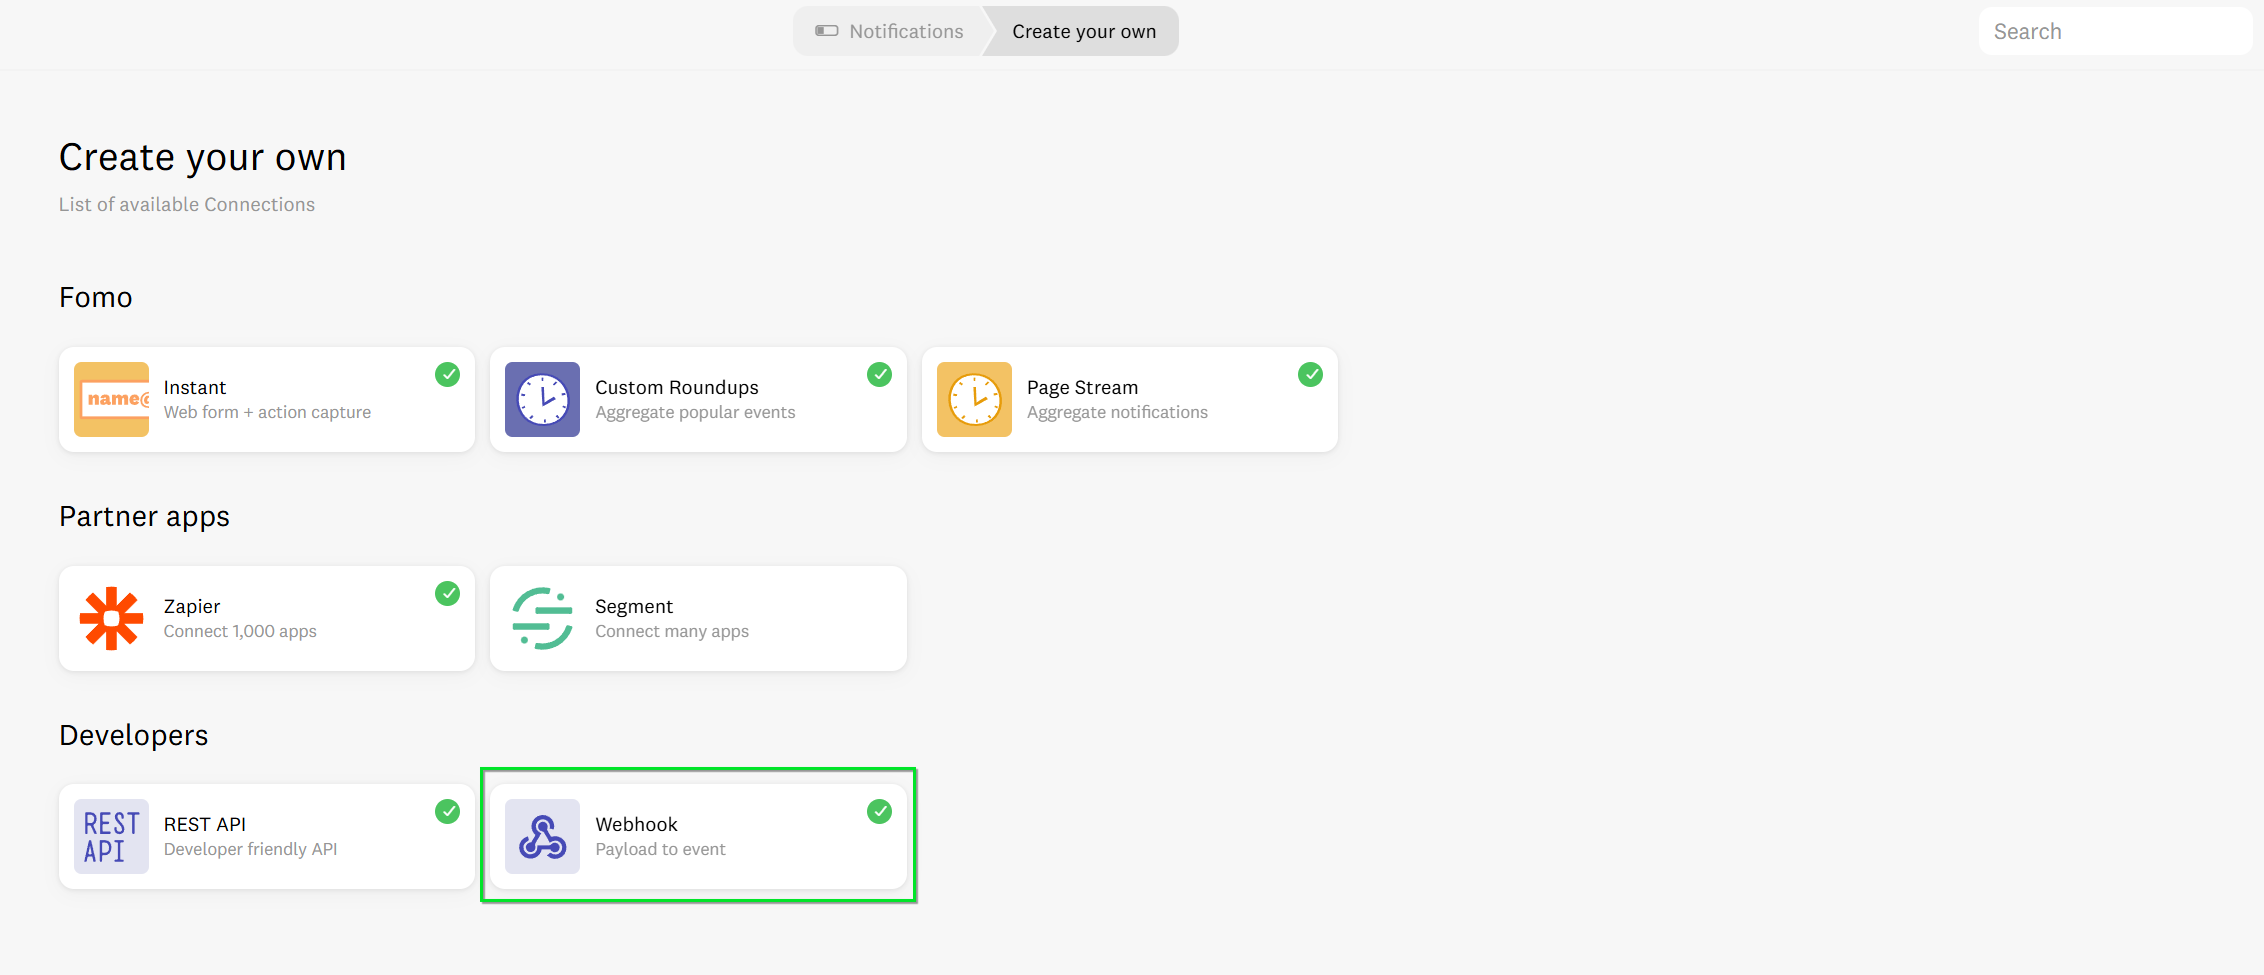
- Give your webhook a descriptive name.
-
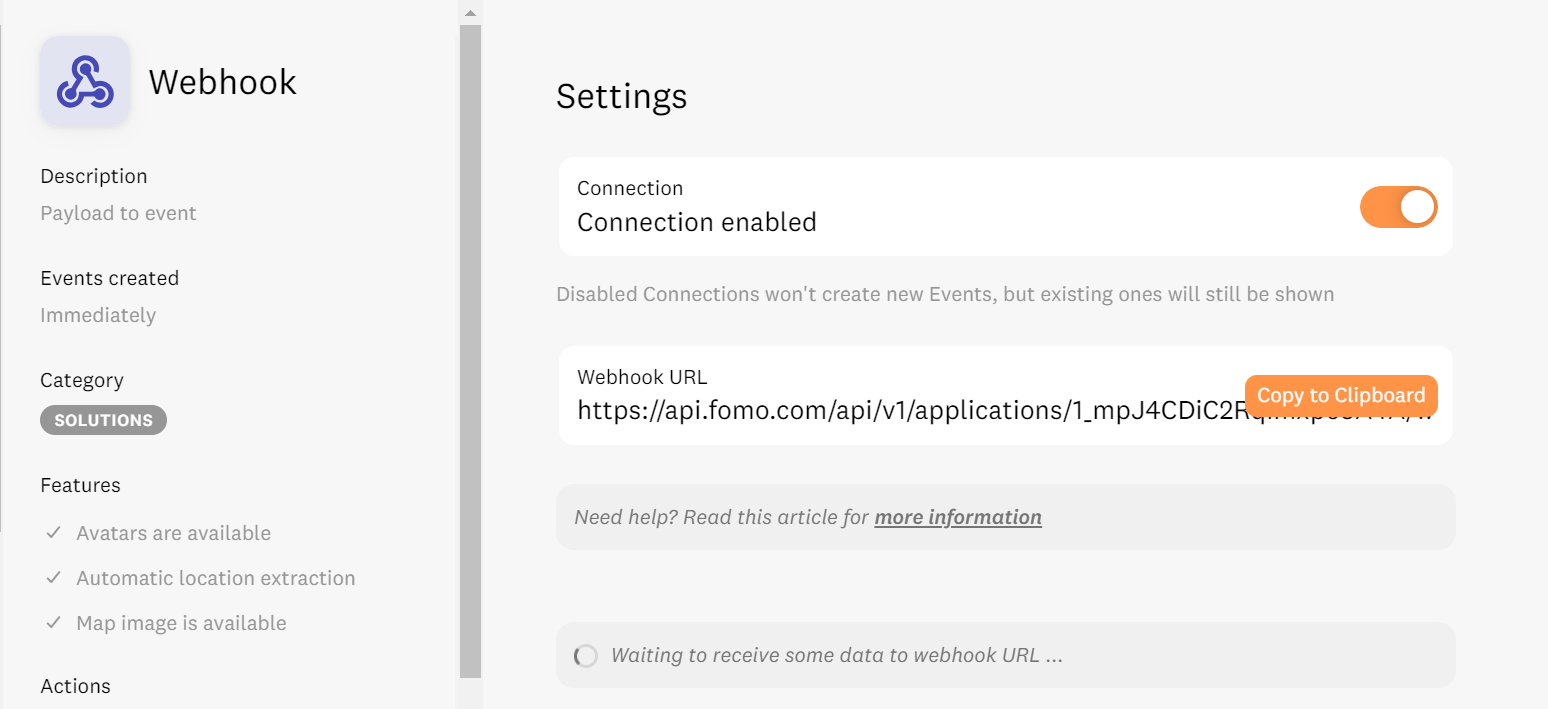
Fomo will provide you with a unique Webhook URL. Copy this; you will paste it into your source app (the app sending the data). Going forward, new webhook events from your external platform will send data to this URL, automatically creating new Fomo notifications.


Step 1.2 Connect Your Source App
Now that you have your Fomo "mailbox" URL, it’s time to tell your source app where to send the data. This is the bridge between your "behind-the-scenes" activity and your customers' eyes.
Whether you're using a world-class CRM, a review platform, or a custom database, the process is usually found under Settings > Webhooks or Developer API.
Custom DBs: If you have a custom SQL/NoSQL backend, simply set up an HTTP POST request to send a JSON payload to your Fomo URL whenever a specific event occurs.
What to look for: Once you're in your app's webhook settings, look for a field labeled "Destination URL," "Endpoint," or "Payload URL." Paste your unique Fomo URL there. Ensure the trigger is set to "Catch Hook" or "Send Data on Event."
CRO Tip: Don't just connect one app. The most successful stores use multiple webhooks to create a "Pulse" of activity mixing sales, reviews, and sign-ups to show that the brand is thriving across every department.
Step 2: Trigger the "Connection Ping" (Critical!)
Fomo needs to "see" your data before you can map it. You cannot proceed to mapping if Fomo hasn't received a test payload yet.

- Go to your source app (the one sending the data) and paste the Fomo Webhook URL into their webhook settings.
- Send a Test: Most apps have a "Send Test" or "Ping" button. If they don't, manually trigger the event (e.g., complete a test purchase or sign up with a test email).
- Once the test is sent, Fomo captures that JSON structure, which unlocks the mapping interface in the next step.
💡 Deep Dive Example: Connecting Shopify Webhooks
While Fomo has a powerful native Shopify app that automatically handles your Sales, Add to Carts, and Low Inventory alerts, you can use Custom Webhooks to capture other unique parts of the buyer journey!
Here is how to route Shopify webhook data directly into Fomo.
Step 1: Add the Webhook to Shopify
- Log in to your Shopify Admin dashboard.
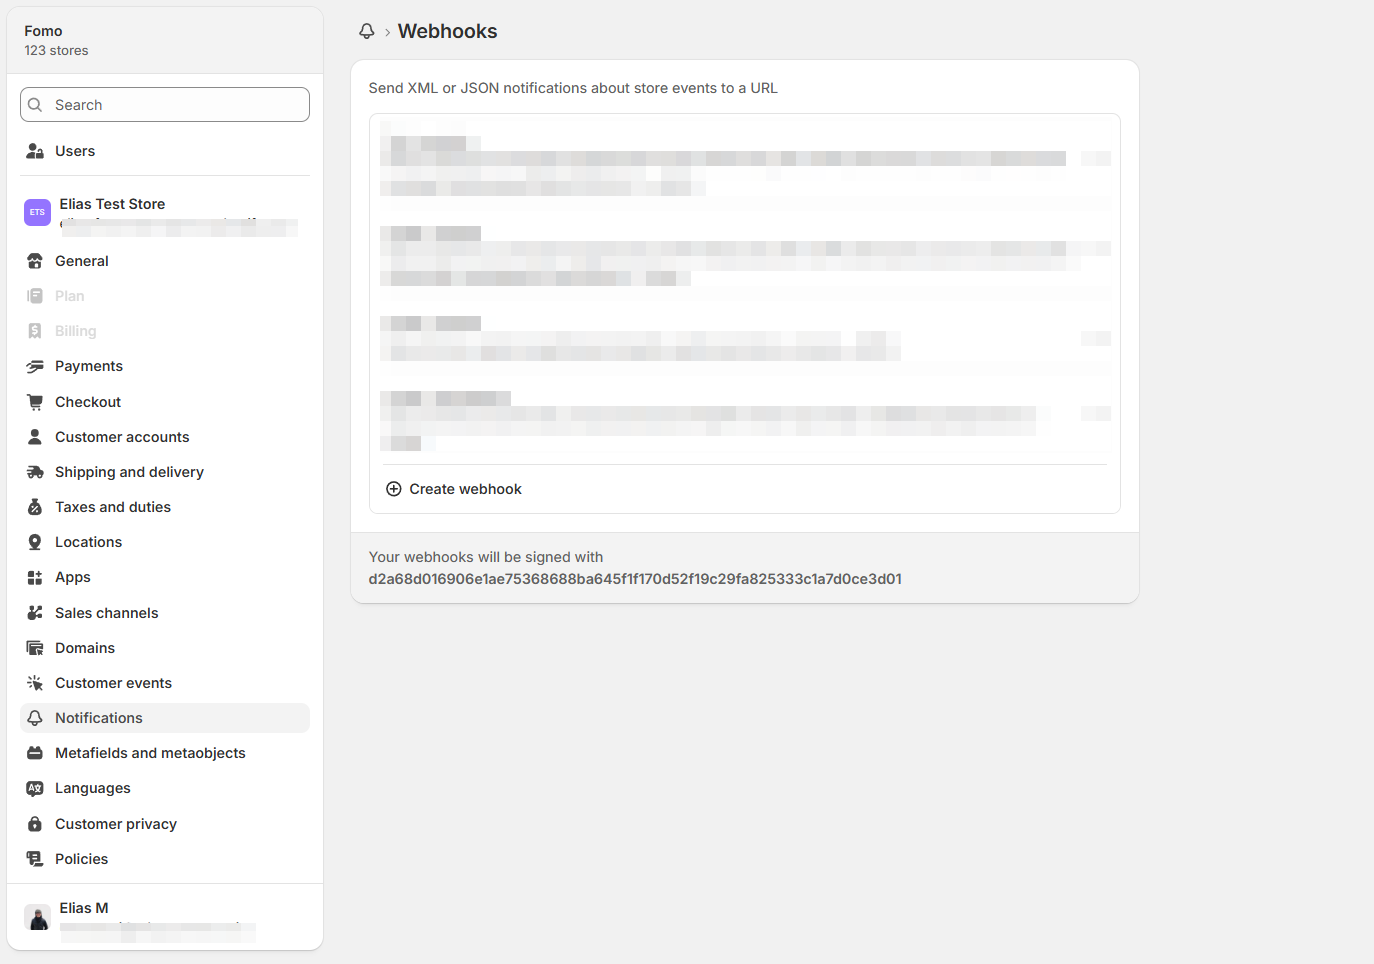
- Go to Settings (bottom left corner) > Notifications.
-
Scroll all the way down to the Webhooks section and click Create Webhook.

Step 2: Configure Your Settings

- Event: Select the event you want to track (see our top recommendations below).
- Format: Always choose JSON.
- URL: Paste the unique Webhook URL you just copied from your Custom Webhook Notification.
- Webhook API version: We highly recommend selecting the Latest (Stable) release from the dropdown menu to ensure the most reliable data delivery.
Click Save 💾.
Before moving to the mapping section below, click Send test notification next to your new Shopify webhook. This sends a "ping" to Fomo so you have data to work with!
For more about the Official Shopify Webhooks Guide
🛒 Best Shopify Webhooks to Leverage for Social Proof
Since our native app already handles standard purchases, use these webhooks to show different types of store activity:
-
📦 Order Fulfillment (
orders/fulfilled): Show prospects that you ship fast! Template: "An order to {{ city }} just shipped out!"
-
👋 Customer Account Creation (
customers/create): Perfect for showcasing community growth. Template: "{{ first_name }} just joined our VIP community!"
-
✨ New Product Creation (
products/create): Build hype around new catalog drops. Template: "A new product was just added to our store!"
- 🤝 Draft Orders (
draft_orders/create): Great for B2B or wholesale stores. Template: "A custom wholesale order was initiated by a customer in {{ city }}!"
Step 3: Mapping Your Data
Now that Fomo has received your test data, it’s time to turn that raw code into a human-readable notification.
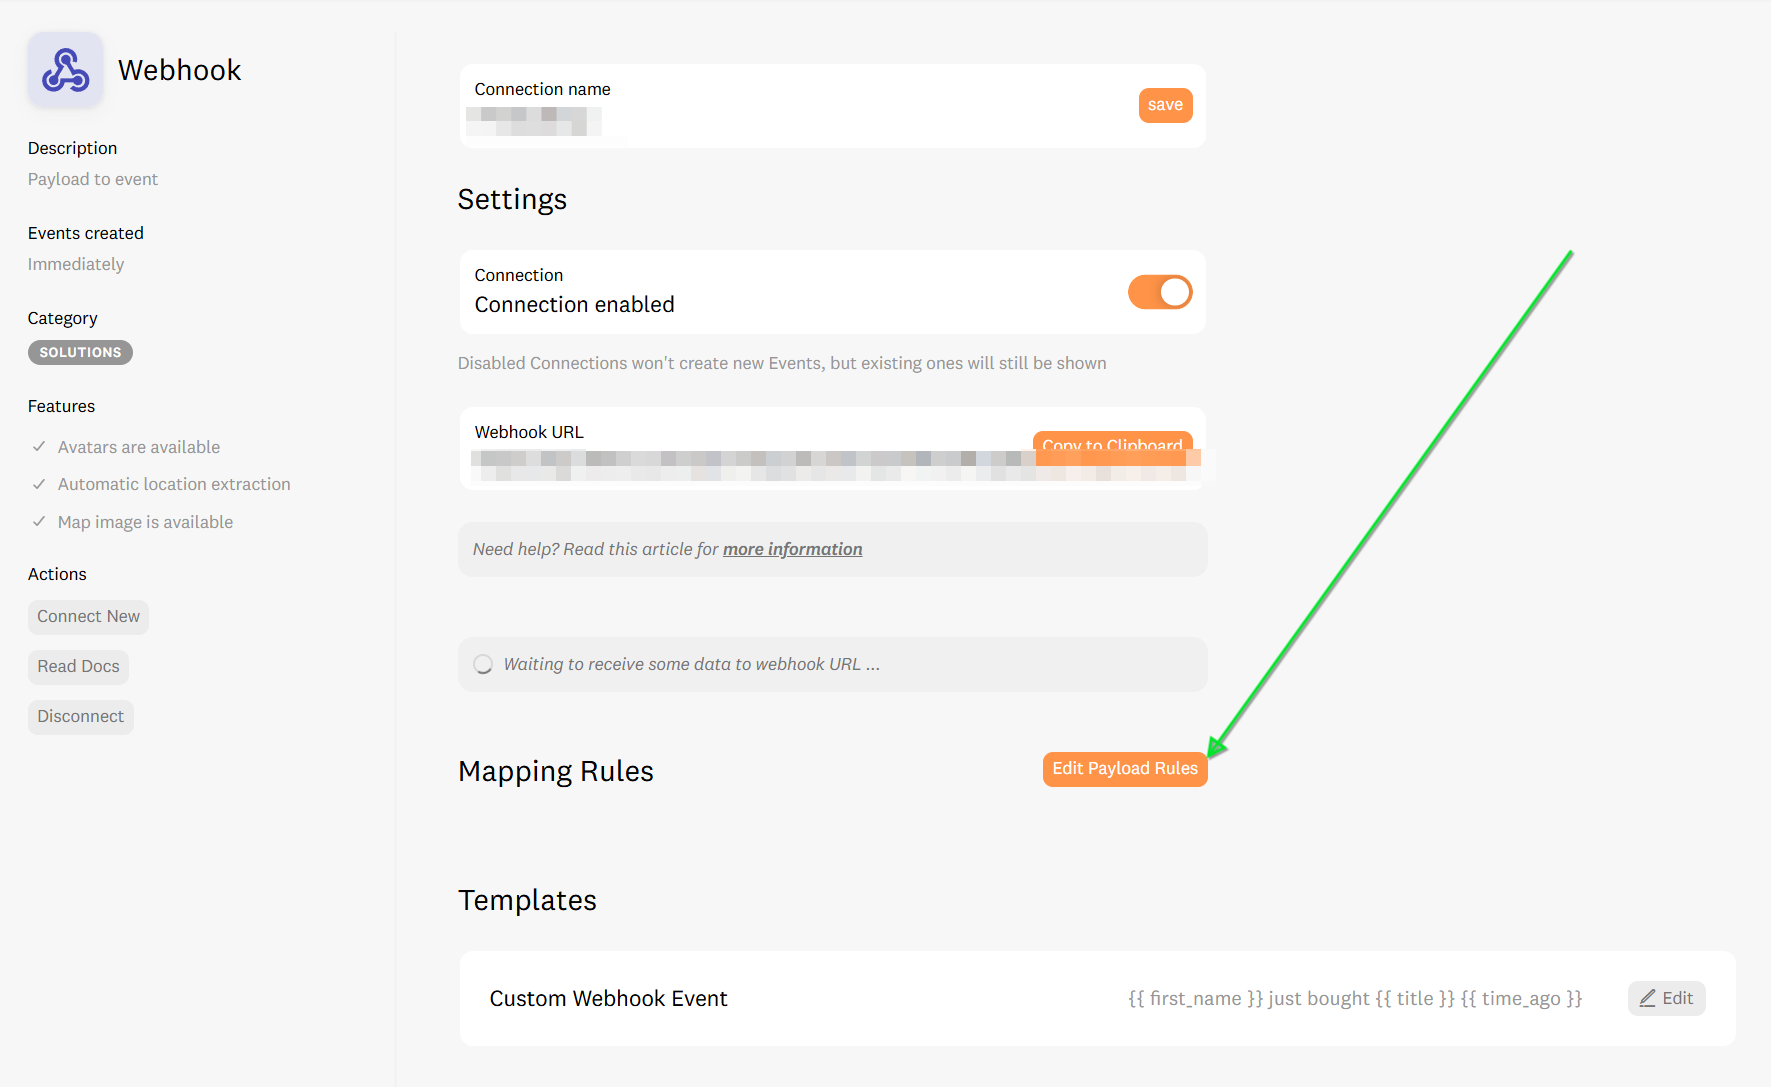
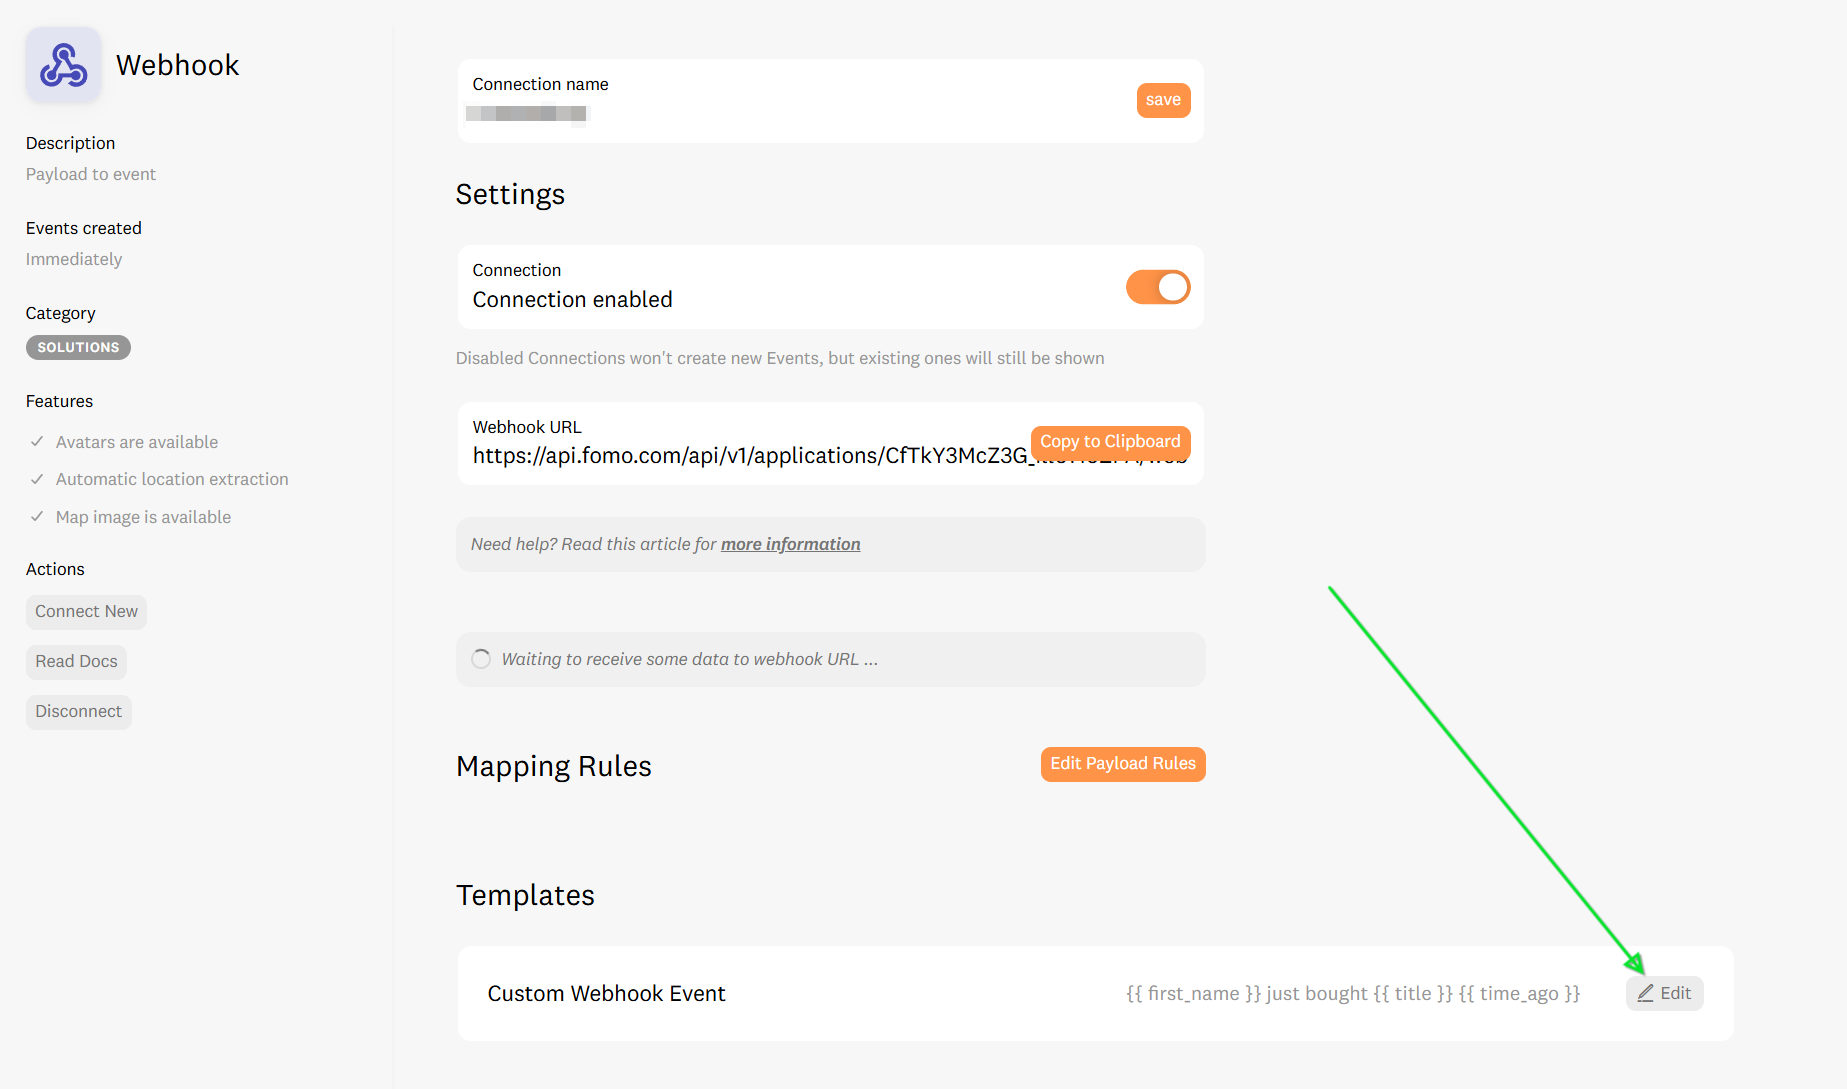
- Inside your Custom Webhook integration in Fomo, click on Settings.
-
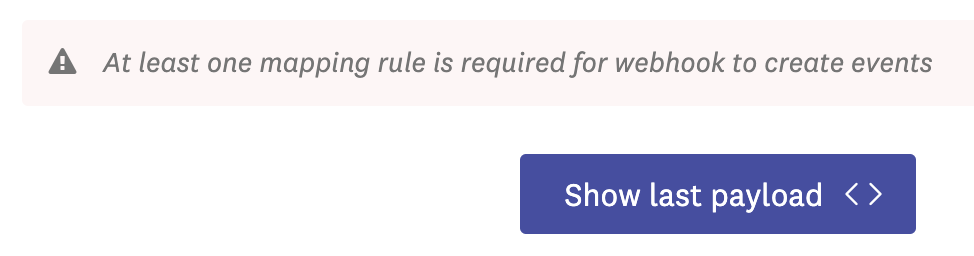
Scroll down to the bottom and click the Edit Payload Rules button.
-
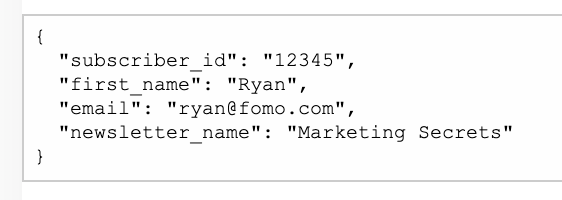
Click Show last payload. This reveals the JSON data Fomo just received. You can now see the exact fields available to map.
Then you will see the last payload:
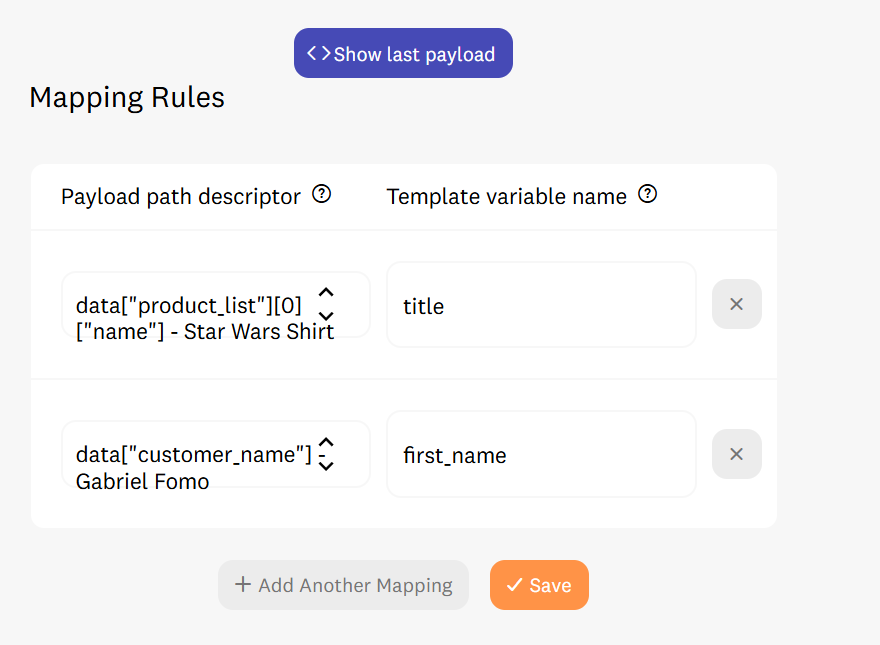
-
Click Add Another Mapping to start pairing your incoming data with Fomo’s variables.


Step 4: The Naming Convention Rule
To ensure your notifications display correctly and your Template Filters work perfectly, you must use Fomo's specific naming conventions for standard fields.
Map your "Incoming Provider Variable" (from your JSON on the left) to the "Fomo Variable Name" (on the right) using these exact terms:
| Data Type | Fomo Variable Name (Must match exactly) |
| Customer First Name | first_name |
| Product/Event Title | title |
| Product/Event URL | url |
| Product/Event Image | image_url |
| Customer City | city |
| Customer State/Province | province |
| Customer Country | country |
| Customer Email | email_address |
| Customer IP Address | ip_address |
| Recipient Name | recipient_name |
| Dollar/Sale Amount | amount |
| Name Initials | initials |
| Product Variant | variant_title |
| Product Tags | product_tags |
Flexibility Note: You can also map any other field to a custom name. If you send member_level , map it to member_level and use {{ member_level }} in your notification template!
Step 5: Prevent Duplicates with external_id
To maintain the integrity of your social proof, you want to avoid showing the same event twice.
The Solution: Choose a unique parameter from your webhook payload (like an Order ID or Subscriber ID) and map it to external_id on the right side of the form.
Example: Map
order_number(left) toexternal_id(right). Fomo will use this to ensure that even if the webhook sends multiple pings for the same order, your visitors only see it once.
Step 6: Crafting Your Message
Once your mapping is finished, click Save. Now, let's make it look beautiful.
-
Navigate to Templates and click Edit.
-
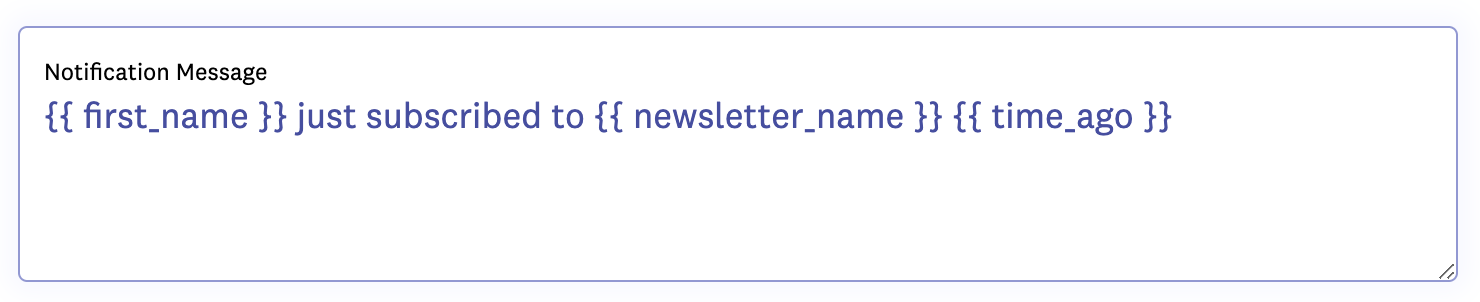
In the message box, write your notification and give it structure using the variables you mapped.
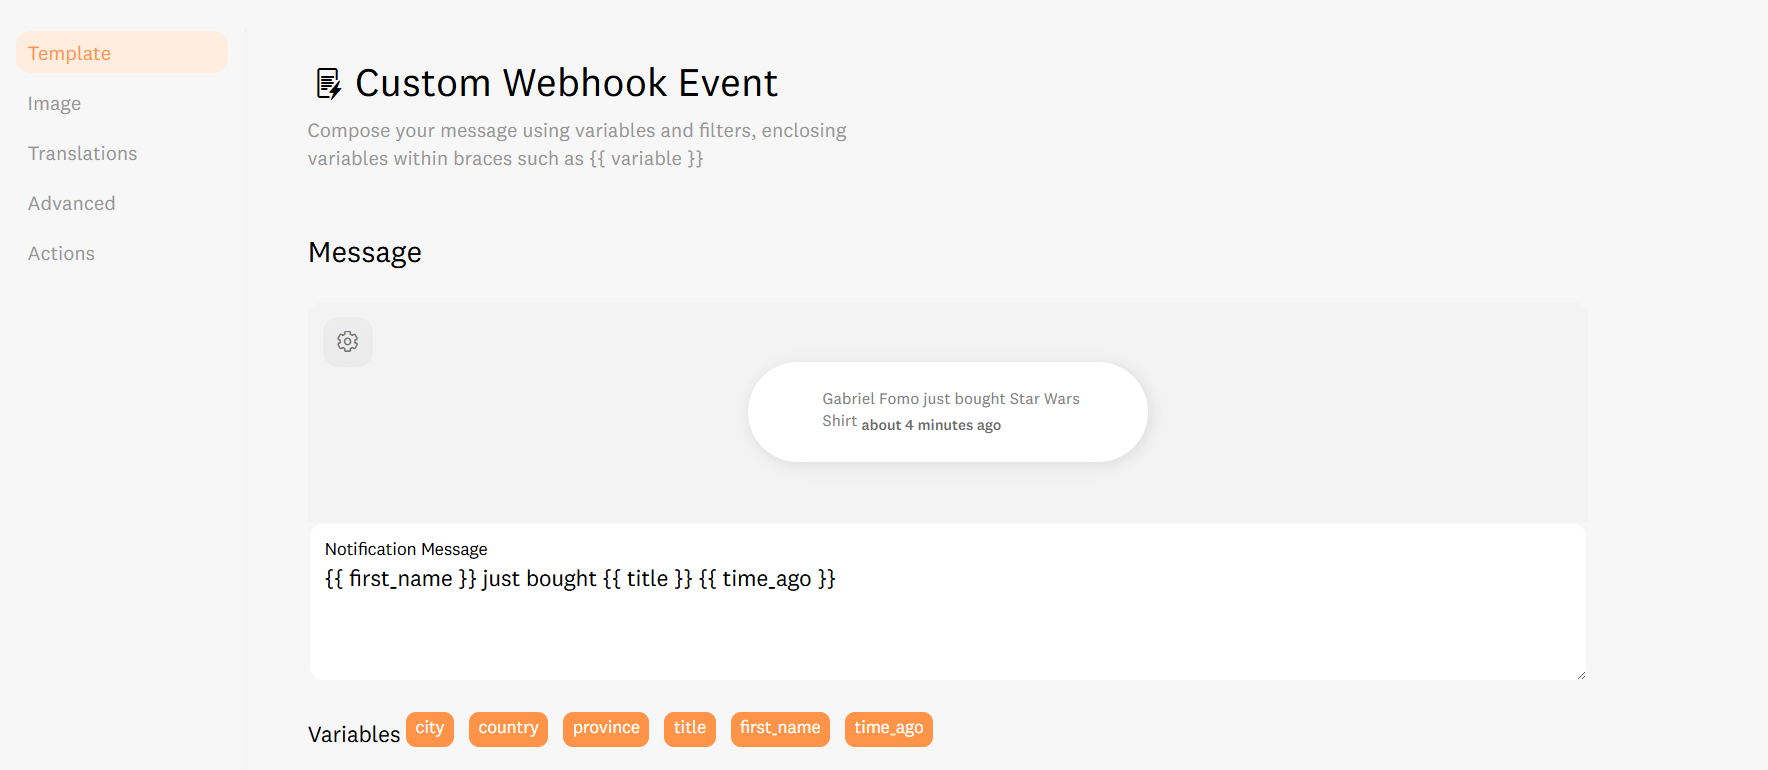


- Example:
{{ first_name }} just joined the {{ member_level }} group!
- Click Save again in the top right corner of your screen.
Step 7: The "Proof of Life" Check
To see your work in action, head over to the Events tab. This is where your latest test event will appear.
- Everything Green? You're good to go!
- Seeing a "Not Showing" stamp? If you see a gray stamp, don't panic. This usually means a required variable (like a city or name) is missing.
- The Fix: Check out our guide on Template Filters and use a Fallback to ensure only your best, most complete data goes live.
Troubleshooting Common Issues
-
"Show last payload" is empty? This means Fomo hasn't received a test yet. Go back to Step 2 and ensure your source app successfully sent a data "ping" to the Fomo URL.
-
Missing Information? Check your naming. If you used
firstnameinstead offirst_name, the data won't merge into the notification.
-
Duplicate Notifications? Ensure you have mapped a unique value to the
external_idfield.
-
How do I connect a new Webhook:


- Want to show off exactly where your recent events are coming from? You can easily set up Fomo to display a map of the customer's location as the image for your notifications
🚀Stuck on a complex JSON structure?
Our team members are mapping wizards. Reach out via the in-app chat, and we’ll help you turn your raw data into conversion-driving social proof.
-
Email us: Drop us a line at hello@fomo.com and our team will jump in to help.
- Skip the troubleshooting: . We’ll hop on a call, share screens, and help you build the perfect social proof engine. Pick the day and time here.