_01JMZ4H43P2JR7Z62M1XDT4TBF.png)
Connecting WooCommerce via Webhooks 🛍️
Sometimes, factors outside of your control like hosting providers, server firewalls, or specific WordPress configurations can block Fomo’s standard API integration from "pulling" your sales data.
If you’ve already tried our main WooCommerce integration and encountered a technical hurdle, don't worry. This article outlines a powerful alternative: The Webhook Method.
While the standard method "pulls" data on a schedule, Webhooks "push" data to Fomo the exact second a sale happens. It is the perfect fail-safe to ensure your Store Vitality remains visible to every visitor.
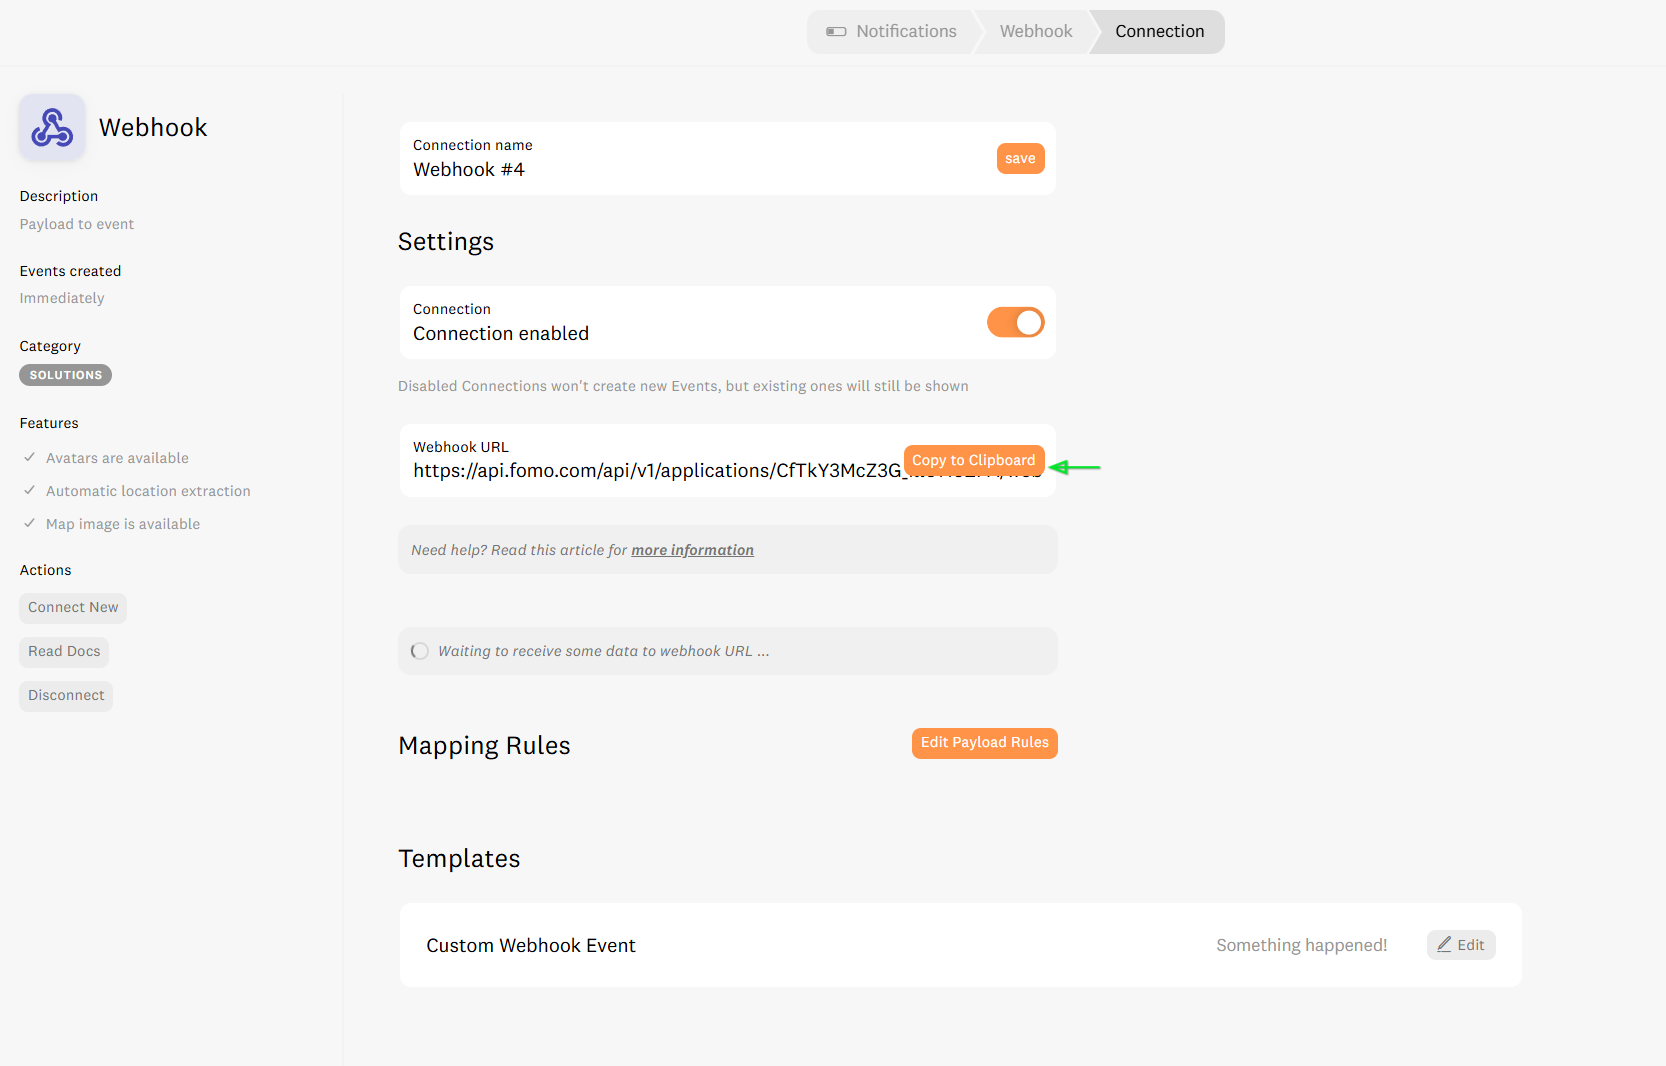
🧠 Step 1: Secure Your Fomo "Inbox" 🛠️
-
Log in to your Fomo dashboard.
-
Navigate to the Notifications tab > click + Add Notifications, then click on all notifications and scroll down or search for Webhook.

-
Click Connect and copy your unique Webhook URL.


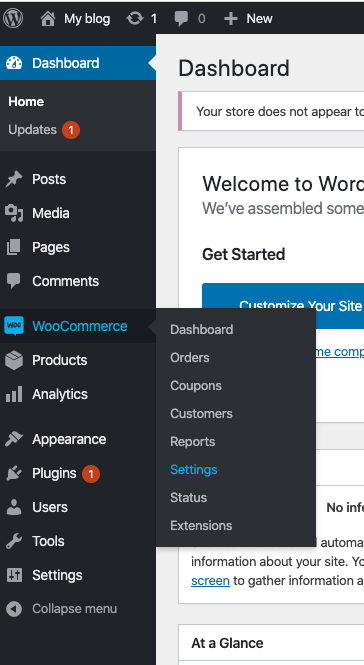
Step 2: Configure the WooCommerce Trigger 🔗
-
Path:
WooCommerce > Settings > Advancedis the correct top-level navigation.
-
Sub-menu: The Webhooks link is located in the horizontal sub-navigation bar at the top of the Advanced tab.
-
Action: The button is labeled "Add webhook" (though if you have no webhooks yet, you might also see a "Create a new webhook" call to action in the center of the page).


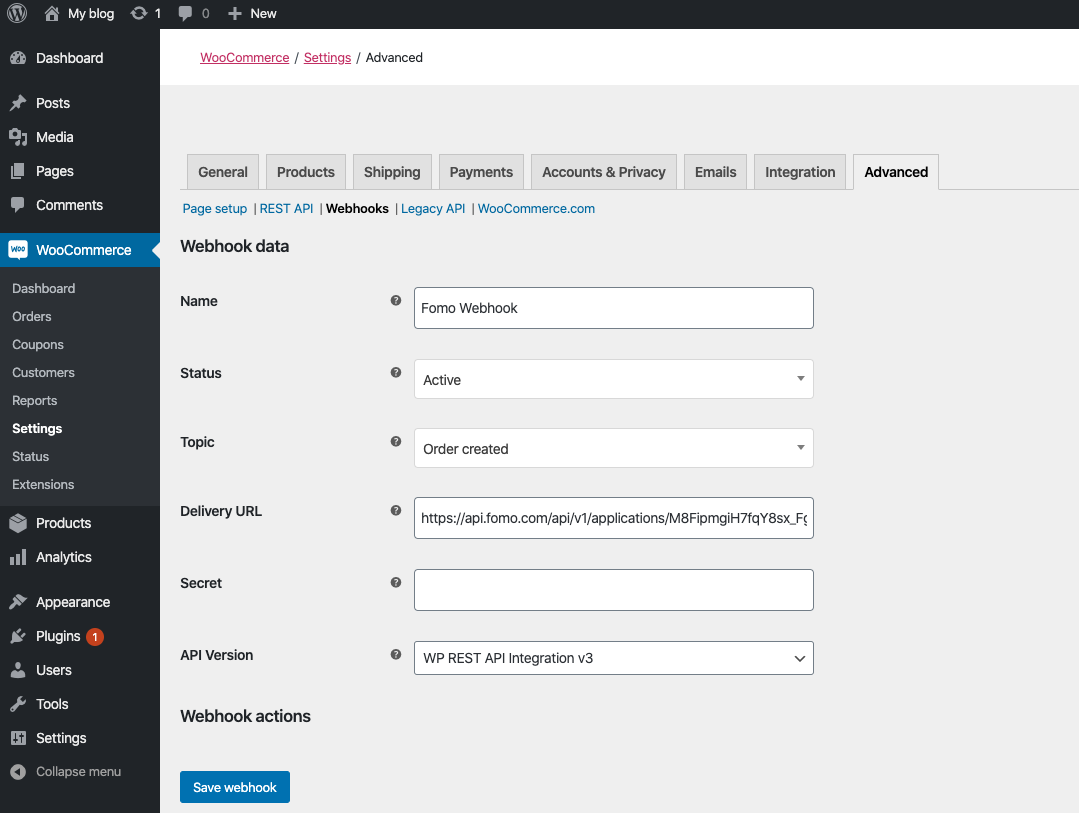
Step 3: Activate the Data Flow ⚡
The fields in the Webhook data box match your list perfectly:
-
Status: You must change this to Active. (By default, WooCommerce often sets new webhooks to Paused, so this is a critical step for CRO).
-
Topic: You will find Order Created in the dropdown menu. This is the most popular choice for Fomo as it captures the "moment of purchase."
-
Delivery URL: This is where you paste your unique Fomo URL.
-
Secret: You can leave this blank. Fomo's integration handles the handshake securely without requiring you to manage a manual secret key.
- API Version: WP REST API Integration v3 is indeed the current gold standard. It is the most stable version and provides the cleanest data for Fomo to map your customer's first name and city.
Mapping Your Data (The "Translator") 🧠
Now that Fomo is receiving data, you must turn that raw code into a human-readable notification. This is where you establish Data Integrity.
-
Trigger a test order in WooCommerce to send a "payload" to Fomo.
-
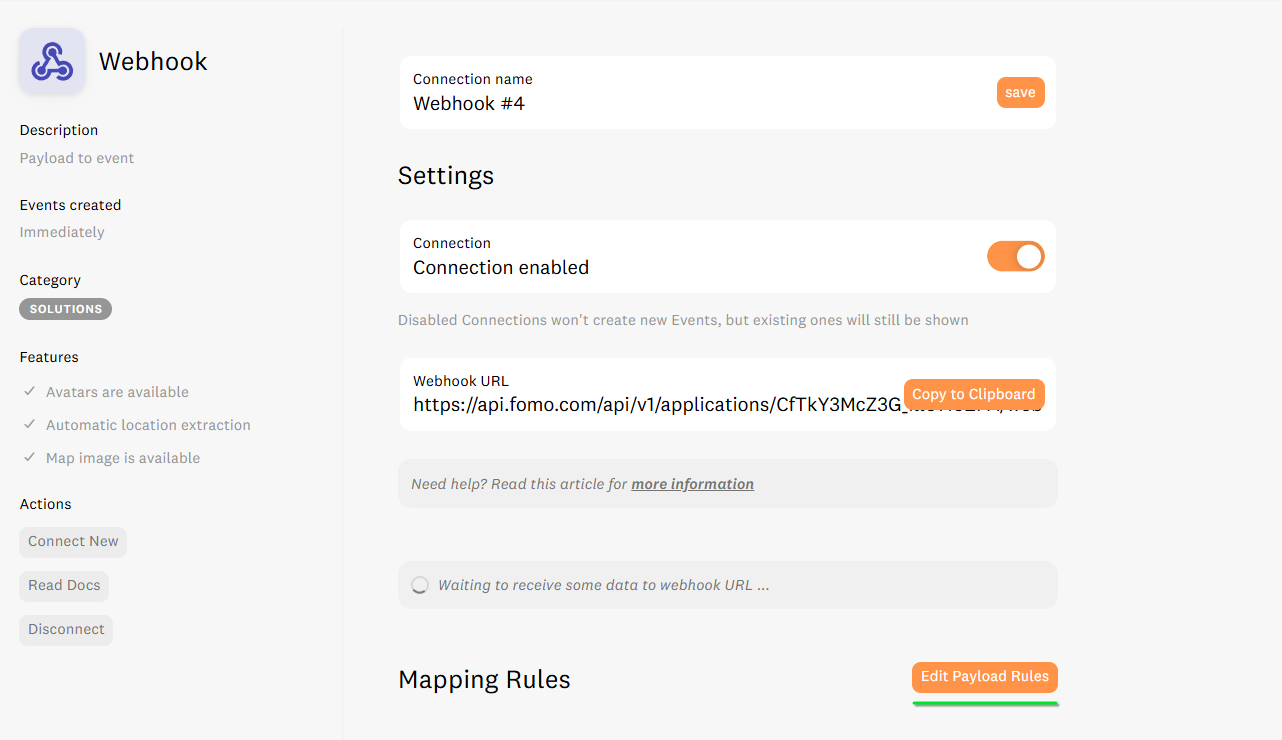
Inside your Custom Webhook integration in Fomo, click on Settings.
-
Scroll to the bottom and click the Edit Payload Rules button.
-
Click Show last payload. This reveals the JSON data Fomo just received. You can now see the exact fields (like
billing_first_nameorline_items) available to map.
- Click Add Another Mapping to start pairing your incoming data with Fomo’s variables.

The Naming Convention Rule 🛡️
To ensure your notifications display correctly and your Template Filters (like fallbacks) work perfectly, you must use Fomo's specific naming conventions.
Map your "Incoming Provider Variable" (from the JSON on the left) to the "Fomo Variable Name" (on the right) using these exact terms:
Flexibility Note: You can map any other field to a custom name. If you send member_level , map it to member_level and use {{ member_level }} in your notification template! This allows for hyper-niche social proof that fits your specific brand.
| Data Type | Fomo Variable Name (Must match exactly) |
| Customer First Name | first_name |
| Product/Event Title | title |
| Product/Event URL | url |
| Product/Event Image | image_url |
| Customer City | city |
| Customer Email | email_address |
| Sale Amount | amount |
🧠 Pro-Tip for Verification
Once you click Save Webhook, WooCommerce will send a "ping" to Fomo.
-
How to check: Look at the top of your WooCommerce screen after saving. If you see a green checkmark or a "Webhook updated successfully" message, you are live.
- The Log: If you ever suspect the data isn't moving, you can go to
WooCommerce > Status > Logsand select the latest webhooks-delivery log from the dropdown to see the real-time "heartbeat" of your social proof.
🎨 Step 4: Visual Optimization & Trust-Building
Because webhooks focus on "instant data," you have unique control over how the notification looks to maintain your brand's Visual Integrity.
-
Set Your Image: You can use a default image icon or upload your own brand logo. Since this setup does not "pull" the specific product image from WooCommerce, using a consistent Brand Badge or Verified Buyer icon creates a clean, uniform look.
-
Activate Avatars: This is a major trust-builder. If you have mapped the
email_addressfield in your template, you can toggle on the Avatar image by following these steps. Fomo will attempt to pull the buyer's Gravatar, replacing a generic icon with a real person's photo.
- The Value: Seeing a real face next to a purchase "humanizes" the proof and drastically increases Verified Authenticity.
⚠️ Technical Considerations (Limitations)
To keep your notifications clear and high-impact, keep these two points in mind:
-
First-Item Focus: To prevent "cluttering" the notification, only the first item in a multi-product order will be used to create the Fomo event.
- Static Images: As mentioned above, this method does not fetch the specific product thumbnail. We recommend using a high-quality brand icon or the Avatar feature to keep your social proof looking professional.
🚀 We’re Here to Help You Sync
Webhooks are your path to a high-conversion "Live Store" atmosphere. If you need help with Gravatar mapping or custom CSS, we’re ready to jump in.
Email us: hello@fomo.com
Work with an Expert: Book a Strategy Call here.🥳